Zektor HDVI5 Especificaciones Pagina 7
- Pagina / 19
- Tabla de contenidos
- MARCADORES


- Z E K T O R 1
- What’s Inside 2
- An Overview of the HDVI5 3
- Easy, Simple, Instructions! 4
- Auxiliary Relay Operation 5
- Using a Remote Control 5
- Pick a remote, any remote! 6
- Step 1: Enter the Setup Mode 10
- Changing Switching Delays 11
- Input Cable Length Tuning 12
- Bandwidth & Sync Settings 13
- Resetting to Factory Defaults 14
- 5 4 3 2 1 15
- 9 8 7 6 15
- e RS-232 Port 15
- +3V to +12V 16
- Specifications 17
- Contact Information 18
- Warranty Policy 18
Relacionado con productos y manuales para Los conmutadores de red Zektor HDVI5
NIGHT OWL LTE-DVR16 quick start podręczniki
Instrukcje obsługi i podręczniki użytkownika dla Systemy monitoringu NIGHT OWL LTE-DVR16 quick start.
Dostarczamy 2 pdf podręczników NIGHT OWL LTE-DVR16 quick start do pobrania za darmo według typów dokumentów: Instrukcja Użytkownika
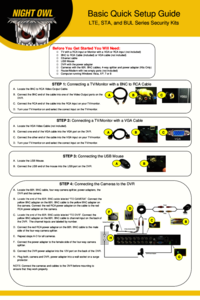
Night owl LTE-DVR16 quick start Instrukcja Użytkownika (2 strony)
Marka: Night-owl | Kategoria: Video surveillance systems | Rozmiar: 0.51 MB |

Spis treści
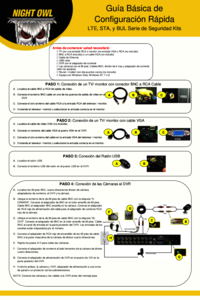
Night owl LTE-DVR16 quick start Instrukcja Użytkownika (2 strony)
Marka: Night-owl | Kategoria: Video surveillance systems | Rozmiar: 0.46 MB |

Spis treści
Więcej produktów i instrukcji dla Systemy monitoringu NIGHT OWL
| Modele | Rodzaj dokumentu |
|---|---|
| LTE-DVR8-5GB setup |
Instrukcja Użytkownika
Night Owl LTE-DVR8-5GB setup User Manual,
2 strony
|
| 4BL-DVR-1TB |
Instrukcja Użytkownika
Night Owl 4BL-DVR-1TB User Manual [en] ,
54 strony
|
| LTE-DVR8-5GB setup |
Instrukcja Użytkownika
Night Owl LTE-DVR8-5GB setup Manual del usuario,
2 strony
|
| STA-88 |
Instrukcja Użytkownika
Night Owl STA-88 User Manual [es] ,
126 strony
|
| LTE-DVR4-5GB quick start |
Instrukcja Użytkownika
Night Owl LTE-DVR4-5GB quick start User Manual,
2 strony
|
| LTE-DVR4-5GB quick start |
Instrukcja Użytkownika
Night Owl LTE-DVR4-5GB quick start Manual del usuario,
2 strony
|
| LTE-DVR8-5GB quick start |
Instrukcja Użytkownika
Night Owl LTE-DVR8-5GB quick start User Manual [es] ,
2 strony
|
| LTE-DVR8-5GB quick start |
Instrukcja Użytkownika
Night Owl LTE-DVR8-5GB quick start Manual del usuario [es] ,
2 strony
|
| STA-88 |
Instrukcja Użytkownika
Night Owl STA-88 Manual del usuario,
134 strony
|
| 16BL-DVR-5GB |
Instrukcja Użytkownika
Night Owl 16BL-DVR-5GB User Manual [en] [de] [es] [fr] [it] ,
52 strony
|
| Poseidon-DVR |
Instrukcja Użytkownika
Night Owl Poseidon-DVR User Manual,
52 strony
|
| Zeus-DVR |
Instrukcja Użytkownika
Night Owl Zeus-DVR User Manual,
52 strony
|
© 2020, manymanuals.es. Todos los derechos reservados | 0.040 s |
 Manymanuals.com
 Manymanuals.de
 Manymanuals.fr
 Manymanuals.it
 Manymanuals.pl
 Manymanuals.cz
 Manymanuals.es
 Manymanuals-pt.com
Comentarios a estos manuales